Setup
This site is designed for computer professional. I am not going to spend a lot of time explaining things you already know. With that said, let’s get started.
Getting your bare bone machine ready to be ESXI or Hyper-v host is simple. Start by unpacking the server and pushing the tab to open the machine. To install the 2 memory cards, unscrew the three screw securing the black CPU fan. Remove the fan and you will see the slots for the memory. Once you have installed the memory and screwed in the fan, turn the computer over and we will install the NVME drives.
On the bottom of the motherboard is a second fan, secured by 3 screws. Remove the screws in insert the 4TB NVME drive and the 1TB NVME drive. If you have a second 4TB NVME drive, install that as well.
Installing VMWare ESXI 8.03
First you will need to setup an account at https://support.broadcom.com. Then you can download a free copy of ESXI 8.03 ISO image from the following link (https://tinyurl.com/4j4ezneb). Once you have downloaded the image, create a bootable USB drive using Rufus, which can be downloaded from the Microsoft App store of from this link (https://github.com/pbatard/rufus/releases/download/v4.11/rufus-4.11.exe).
Your Minisforum MS-A2 should boot from your USB drive and easily install ESXI 8.03. Remember to install the ESXI to the 4TB disk, not the 1TB disk, that disk will be used for memory tiering after the installation. Also, have the computer plugged into the network. Finishing the configuration will be done from another machine.
When you are done with the install the address of the host will be displayed on the screen. At this point I would recommend configuring the management network with a static IP address, it will make your life much easier later on.
Note: ESXI 8.03 comes with a free stand-alone license. If you have multiple hosts or need any features available in the standard edition, you will need to purchase a license. ESXI 8.03 is the last version to support a non-expiring license. With the advent of ESXI 9.0 the licensing is now a subscription model. So for now we are sticking with the 8.03 version.
Configuring your host machine
There are only 2 thing left to do to have your VMWare server up and running and ready to run multiple virtual machines. First we have to setup Memory Tiering, and then we have to install the driver for the Realtek network adapter.
Memory Tiering
We need to allow SSH and the ESXI shell to do the setup. Log on to your ESXI host and turn on the 2 services. Under Host go to Manage and services.
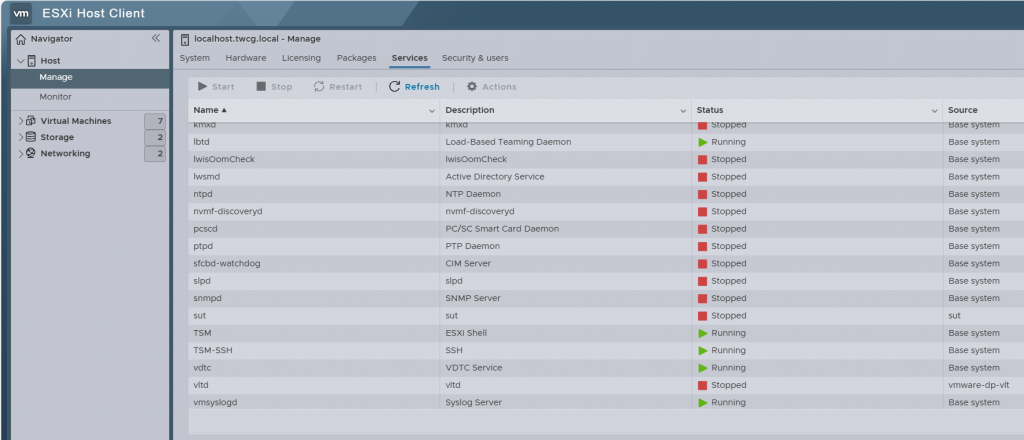
Start TSM and TSM-SSH. Next go to Storage and copy the device name of the installed 1TB NVME drive.
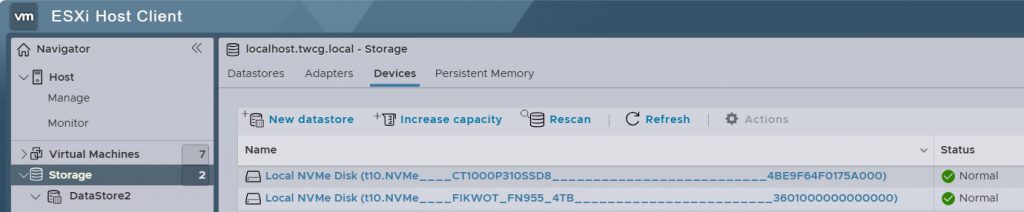
For my machine the device name is
t10.NVMe____CT1000P310SSD8__________________________4BE9F64F0175A000
You will need this shortly.
To SSH into you host I would recommend downloading a copy of Putty from here. (https://the.earth.li/~sgtatham/putty/latest/w64/putty.exe).
Once you have logged in to the ESXI shell you just need to copy and paste the following commands and reboot.
esxcli system settings kernel set -s MemoryTiering -v TRUE
esxcli storage core path list
esxcli system tierdevice create -d /vmfs/devices/disks/t10.NVMe____CT1000P310SSD8__________________________4BE9F64F0175A000
esxcli system settings advanced set -o /Mem/TierNvmePct -i 200
Replace the device name (in red) with the name of you 1TB drive.
After restarting the host, if this has worked properly, you should see 281GB of memory.
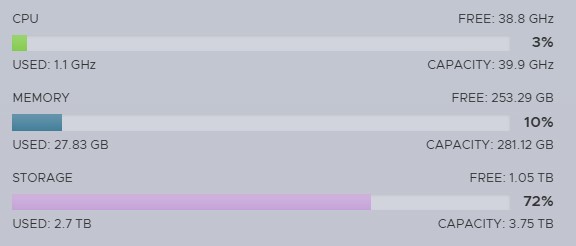
For this machine I already have several VMs running so my storage and CPU usage will be higher than yours.
Installing the Realtek Network Driver.
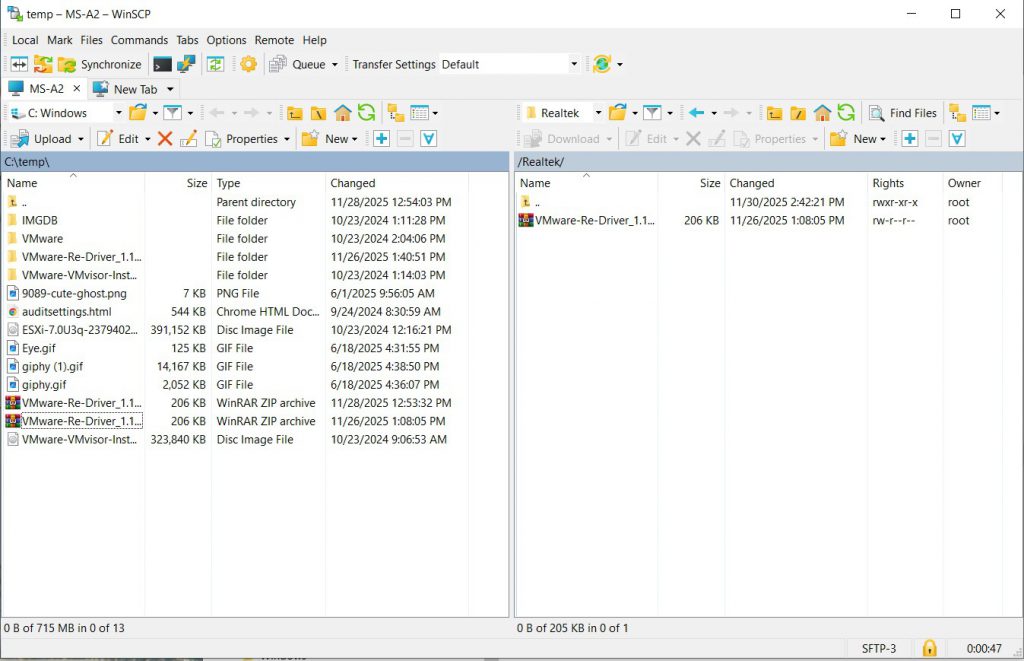
First download winSCP so we can copy the driver to the VM Host. The go to the free fling download page on the Broadcom site (you will have to register, but it is free) and download the Fling Realtek driver. (https://tinyurl.com/37ztu54x). At the time of this writing the current file is VMware-Re-Driver_1.101.01-5vmw.800.1.0.20613240.zip.
Open winSCP and enter your host’s ip address, username (root) and password. And change the file protocol to SCP.
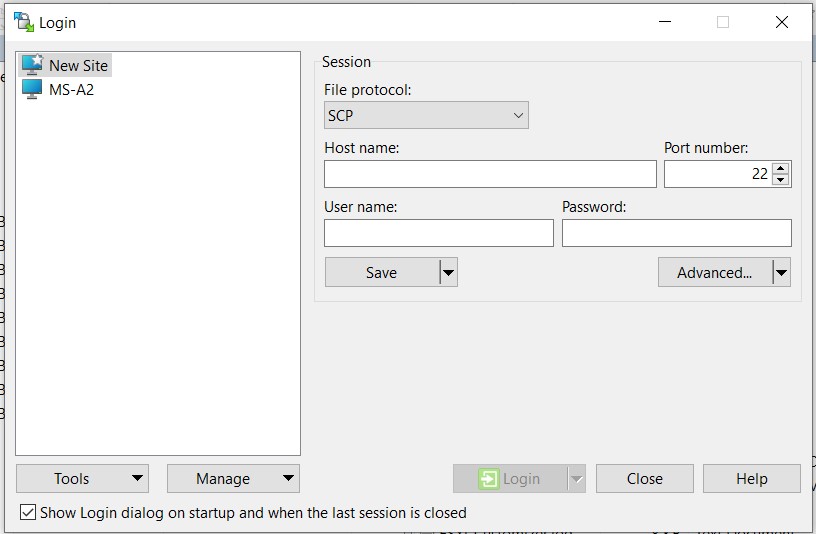
After you login, create a new directory on the host called Realtek and copy the Realtek driver from you windows workstation to the ESXI host.
Now start SSH and ESXI shell just as you did when configuring memory Tiering. Use Putty to SSH into your host. After logging in run the following commands.
cd \ Realtek
esxcli software component apply -d /Realtek/VMware-Re-Driver_1.101.01-5vmw.800.1.0.20613240.zip
And then reboot.
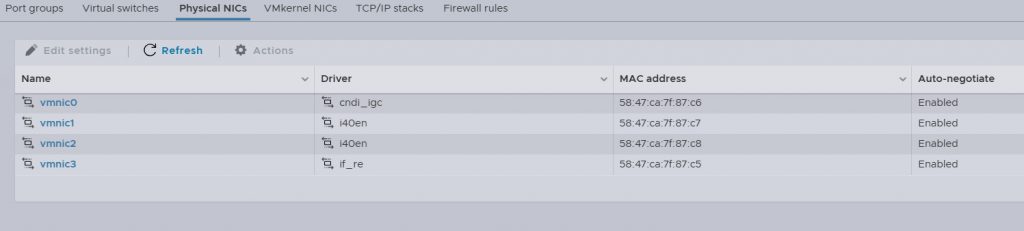
You should now see 4 physical NICs on your host.
Note: Commands are case sensitive.